The King of the Asanas is calling! You too can practice the headstand or work towards it by learning the Dolphin to gain strength, flexibility and determination. The Headstand is the first asana in the sequence, but if you are not practicing the headstand yet, please review this post and learn how to practice the Dolphin.

The Headstand is the only advanced asana in the basic series, so it must be approached with caution and awareness. It is generally safe to practice the headstand if you don’t identify with any of the counter indications (see below); but if you are new to this practice we strongly recommend you find a teacher who can guide you in person until you feel safe, comfortable and confident. If you are practicing the headstand in some capacity but still need a little fine tuning, this guide will get you to overcome the hurdles commonly faced in reaching a straight, relaxed yet strong headstand practice.
Are you ready for the headstand?
The headstand takes a certain level of arm, shoulder and core strength. It is generally recommended that you are able to do three sets of Dolphin (10 rounds per set) and easily perform 10 double leg raises before moving on to the Headstand. This is simply a suggestion so you can gauge your own strength and preparedness. We have a recorded basic class that has instruction geared towards headstand preparation(LINK).
Benefits:
- Increases flow of blood to the brain, spinal cord and nervous system.
- Helps to remove/prevent varicose veins.
- Increases the ability to concentrate and energizes the mind.
- Relieves tension in the lower back.
- Strengthens the cervical spine when practiced properly.
- Helps develop confidence and will.
Counter indications (reasons you should not practice the headstand):
- Current neck/back injury or pain.
- High or low blood pressure, even if controlled.
- Eye conditions such as glaucoma, detached retina or recent eye surgery.
- You are pregnant, as there is a chance of falling when practicing this asana.
- If you have a headache or severe sinus congestion, you may not want to practice on that day.
- Women who are on their cycle may opt to skip this asana.
Instructions:
In this practice we do not recommend using the wall for support. For new students we only recommend coming into the half headstand and gaining strength and stability before attempting to straighten the legs. In half headstand there is less chance of falling as you may simply place the feet back on the ground to regain balance. The half headstand also enables you to get comfortable upside down, since often people are disoriented when beginning this practice. But most importantly if you can hold the half headstand for at least 30 seconds, with control, you most likely have the strength and control to come up the rest of the way safely.
*Important: When you practice the headstand most of the weight should be in the arms. Almost no weight is on the head and the neck should not feel compressed. If you feel too much weight on the head/neck or experience any pain stop the practice immediately. The headstand should only be held as long as it’s comfortable and you are in control. Come out immediately if you feel tired or unstable. After becoming stable in the half headstand position, you can begin holding the headstand for 5 seconds and slowly increase the time as your strength increases. New students should learn this asana under the guidance of a teacher.
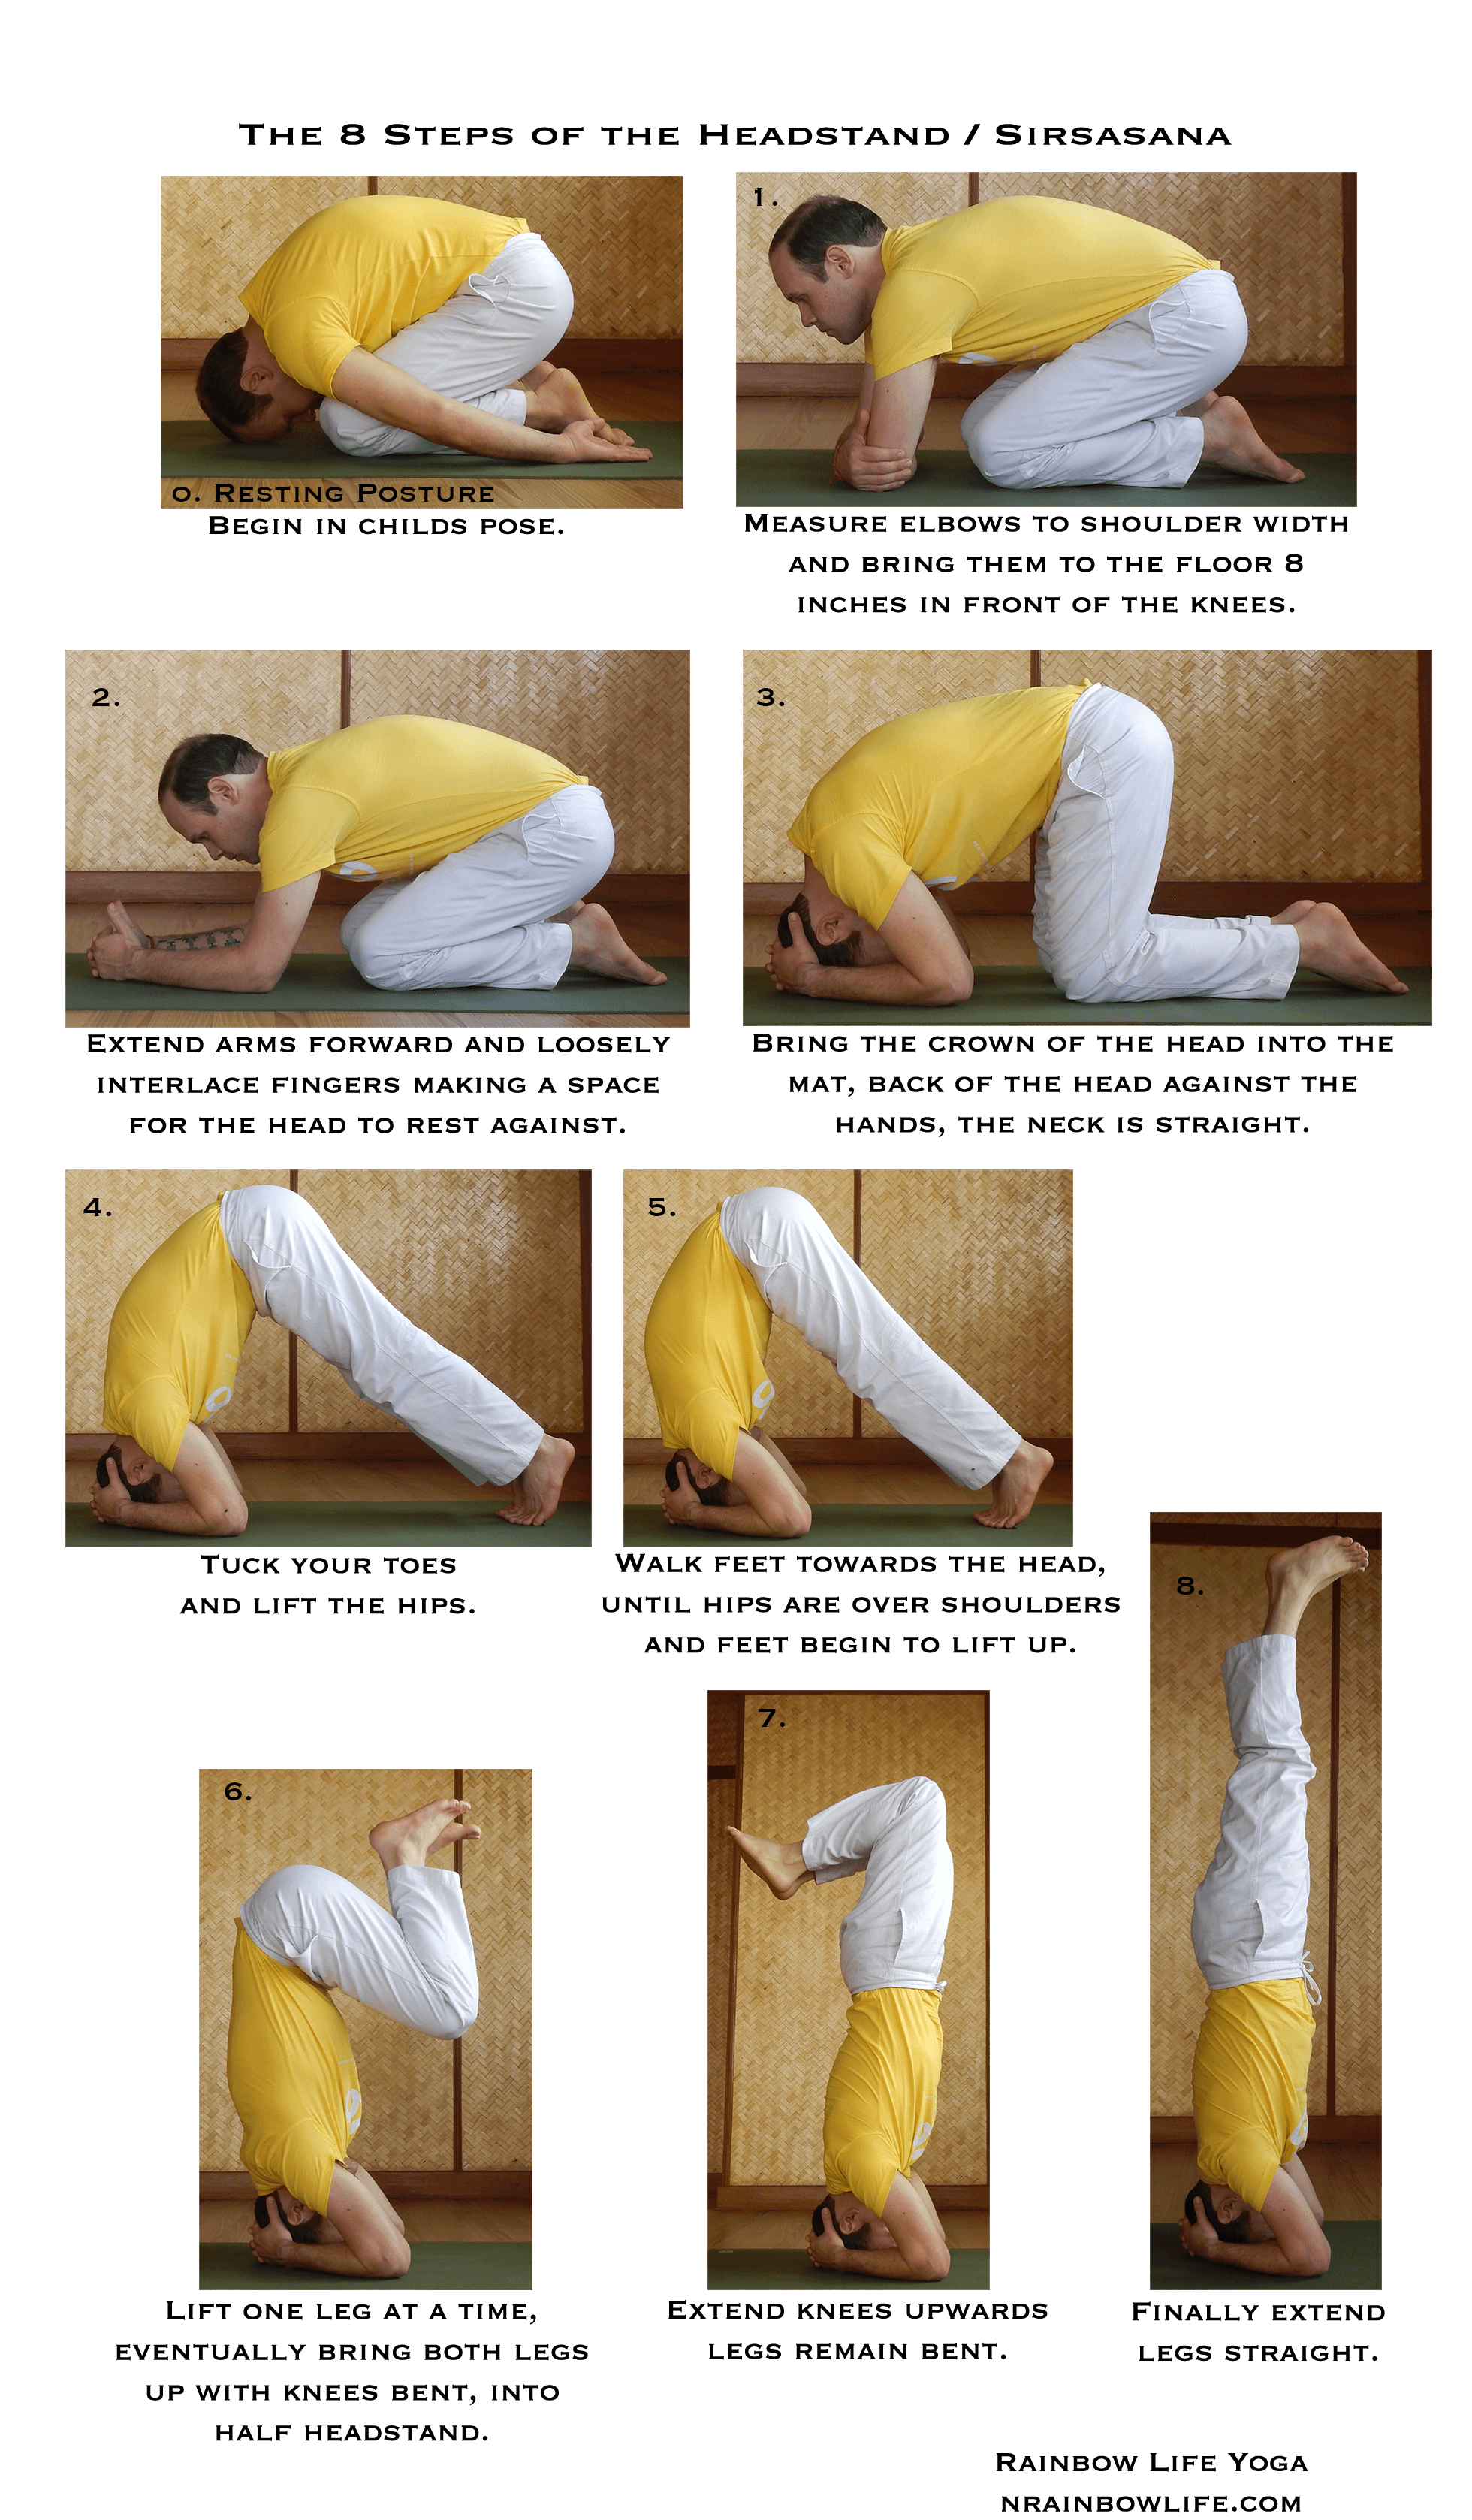
0. Begin by resting in Child’s Pose.
- Sit up on the heels. Measure the elbows making sure they are no wider than shoulder width, bring them to the mat about 8 inches/20cm away from the knees. If the elbows are wider than the shoulders it will take more strength to lift up and hold the position.
- Extend the hands out and interlace the fingers loosely, the thumbs point up. If fingers are tightly interlaced then it will be difficult to release them quickly should one fall, also a tight grip will cause you to exert more energy and become tired.
- Bring the top of the head onto the mat, the back of the head rests against the hands. The perfect head position is slightly different for everyone but what is most important is that the neck is straight. Have your teacher check and tell you if your neck is straight so you can confidently continue to the next step.
- Begin pressing firmly into the mat with the arms. Tuck your toes and lift the hips.
- Then begin walking the feet towards the head. When the hips are roughly over the shoulders the feet will feel like they are lifting off the ground.
- Keep the arms strong, there should still be very little weight on the head. The abdomen should also be firmly engaged, then begin lifting the feet off the ground. If you are still getting comfortable, only pick up one leg at a time, alternating legs. Eventually bring both feet off the ground, knees tucked in towards the chest. This is the half headstand. Get comfortable and stable here before attempting any further steps.
- Then extend the knees upwards, the feet remain tucked in towards the back of the legs. Continue to raise the knees until they are directly over the hips. In this position the lower back will arch slightly and you may feel as though you will fall backwards. This means the knees are high enough.
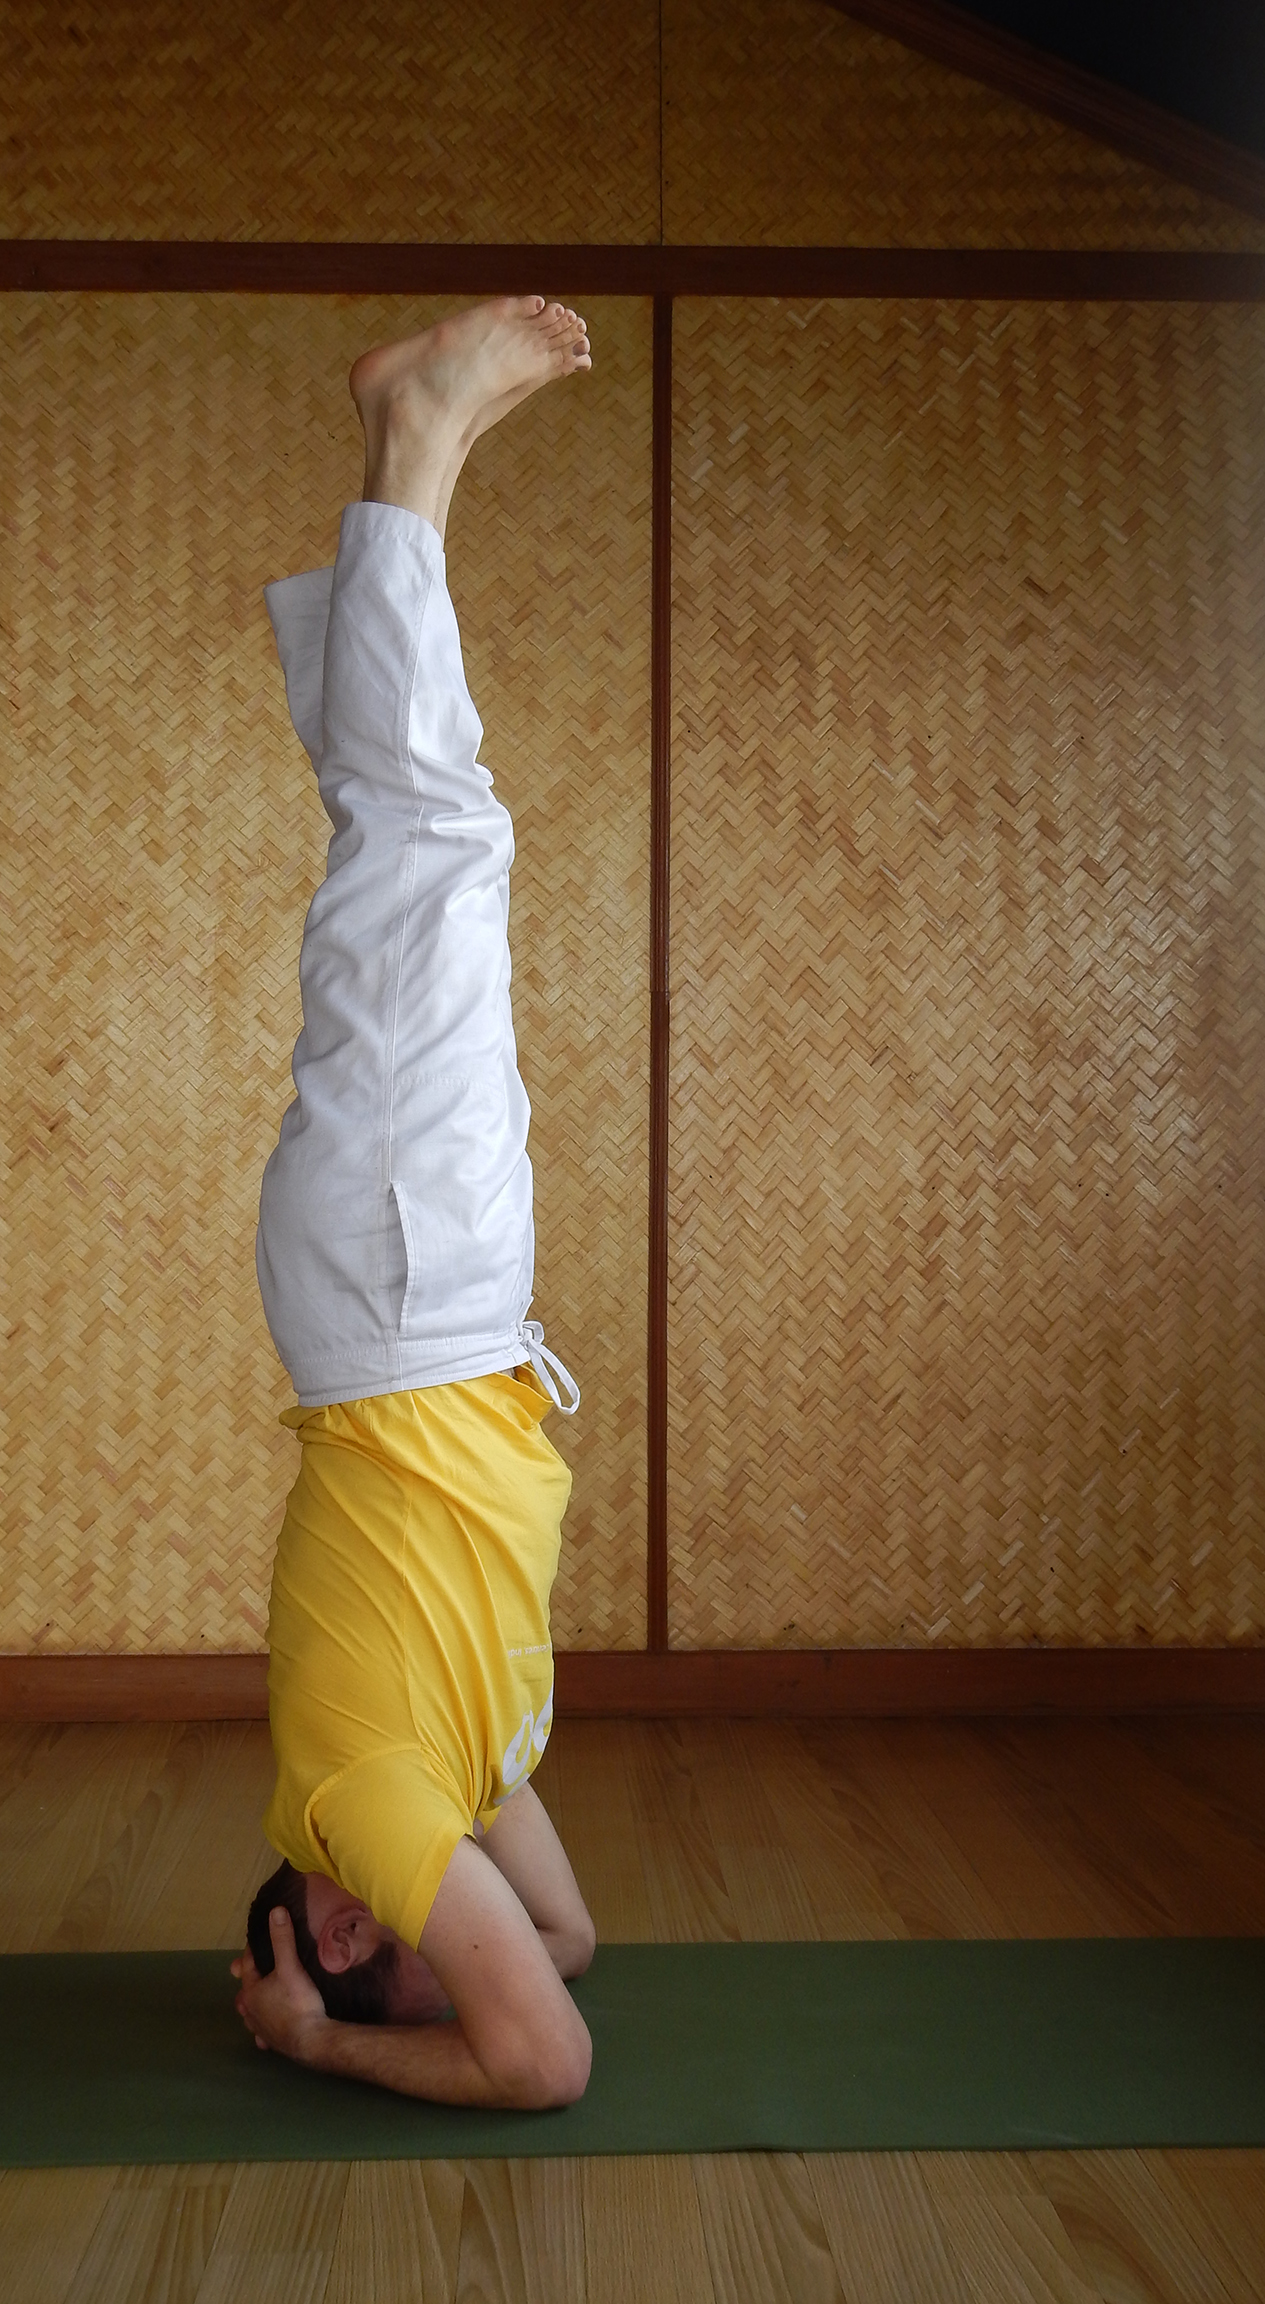
- Finally extend the legs straight into the full headstand. The slight arch in the lower back from step 7 should naturally straighten out as the legs are extended straight. Often in this position if the student has not completely brought their knees vertical in the previous step, the legs will be straight but out over the head. This will take a lot of arm strength to hold. If the feet are out over the head, come back to child’s pose, rest and then start over from step one. If in the headstand you are in a crescent shape come down immediately. This is often caused by relaxing the abdomen allowing the lower back to over arch. Start again from step one and try to keep the abdomen tighter when raising the knees in step 7.
- Hold the pose as long as is comfortable, reserving enough strength to come out of the pose with control.
- Return to Child’s Pose by reversing the 8 steps. Rest in Child’s Pose, keep the head down.
- Come to Savasana and relax.
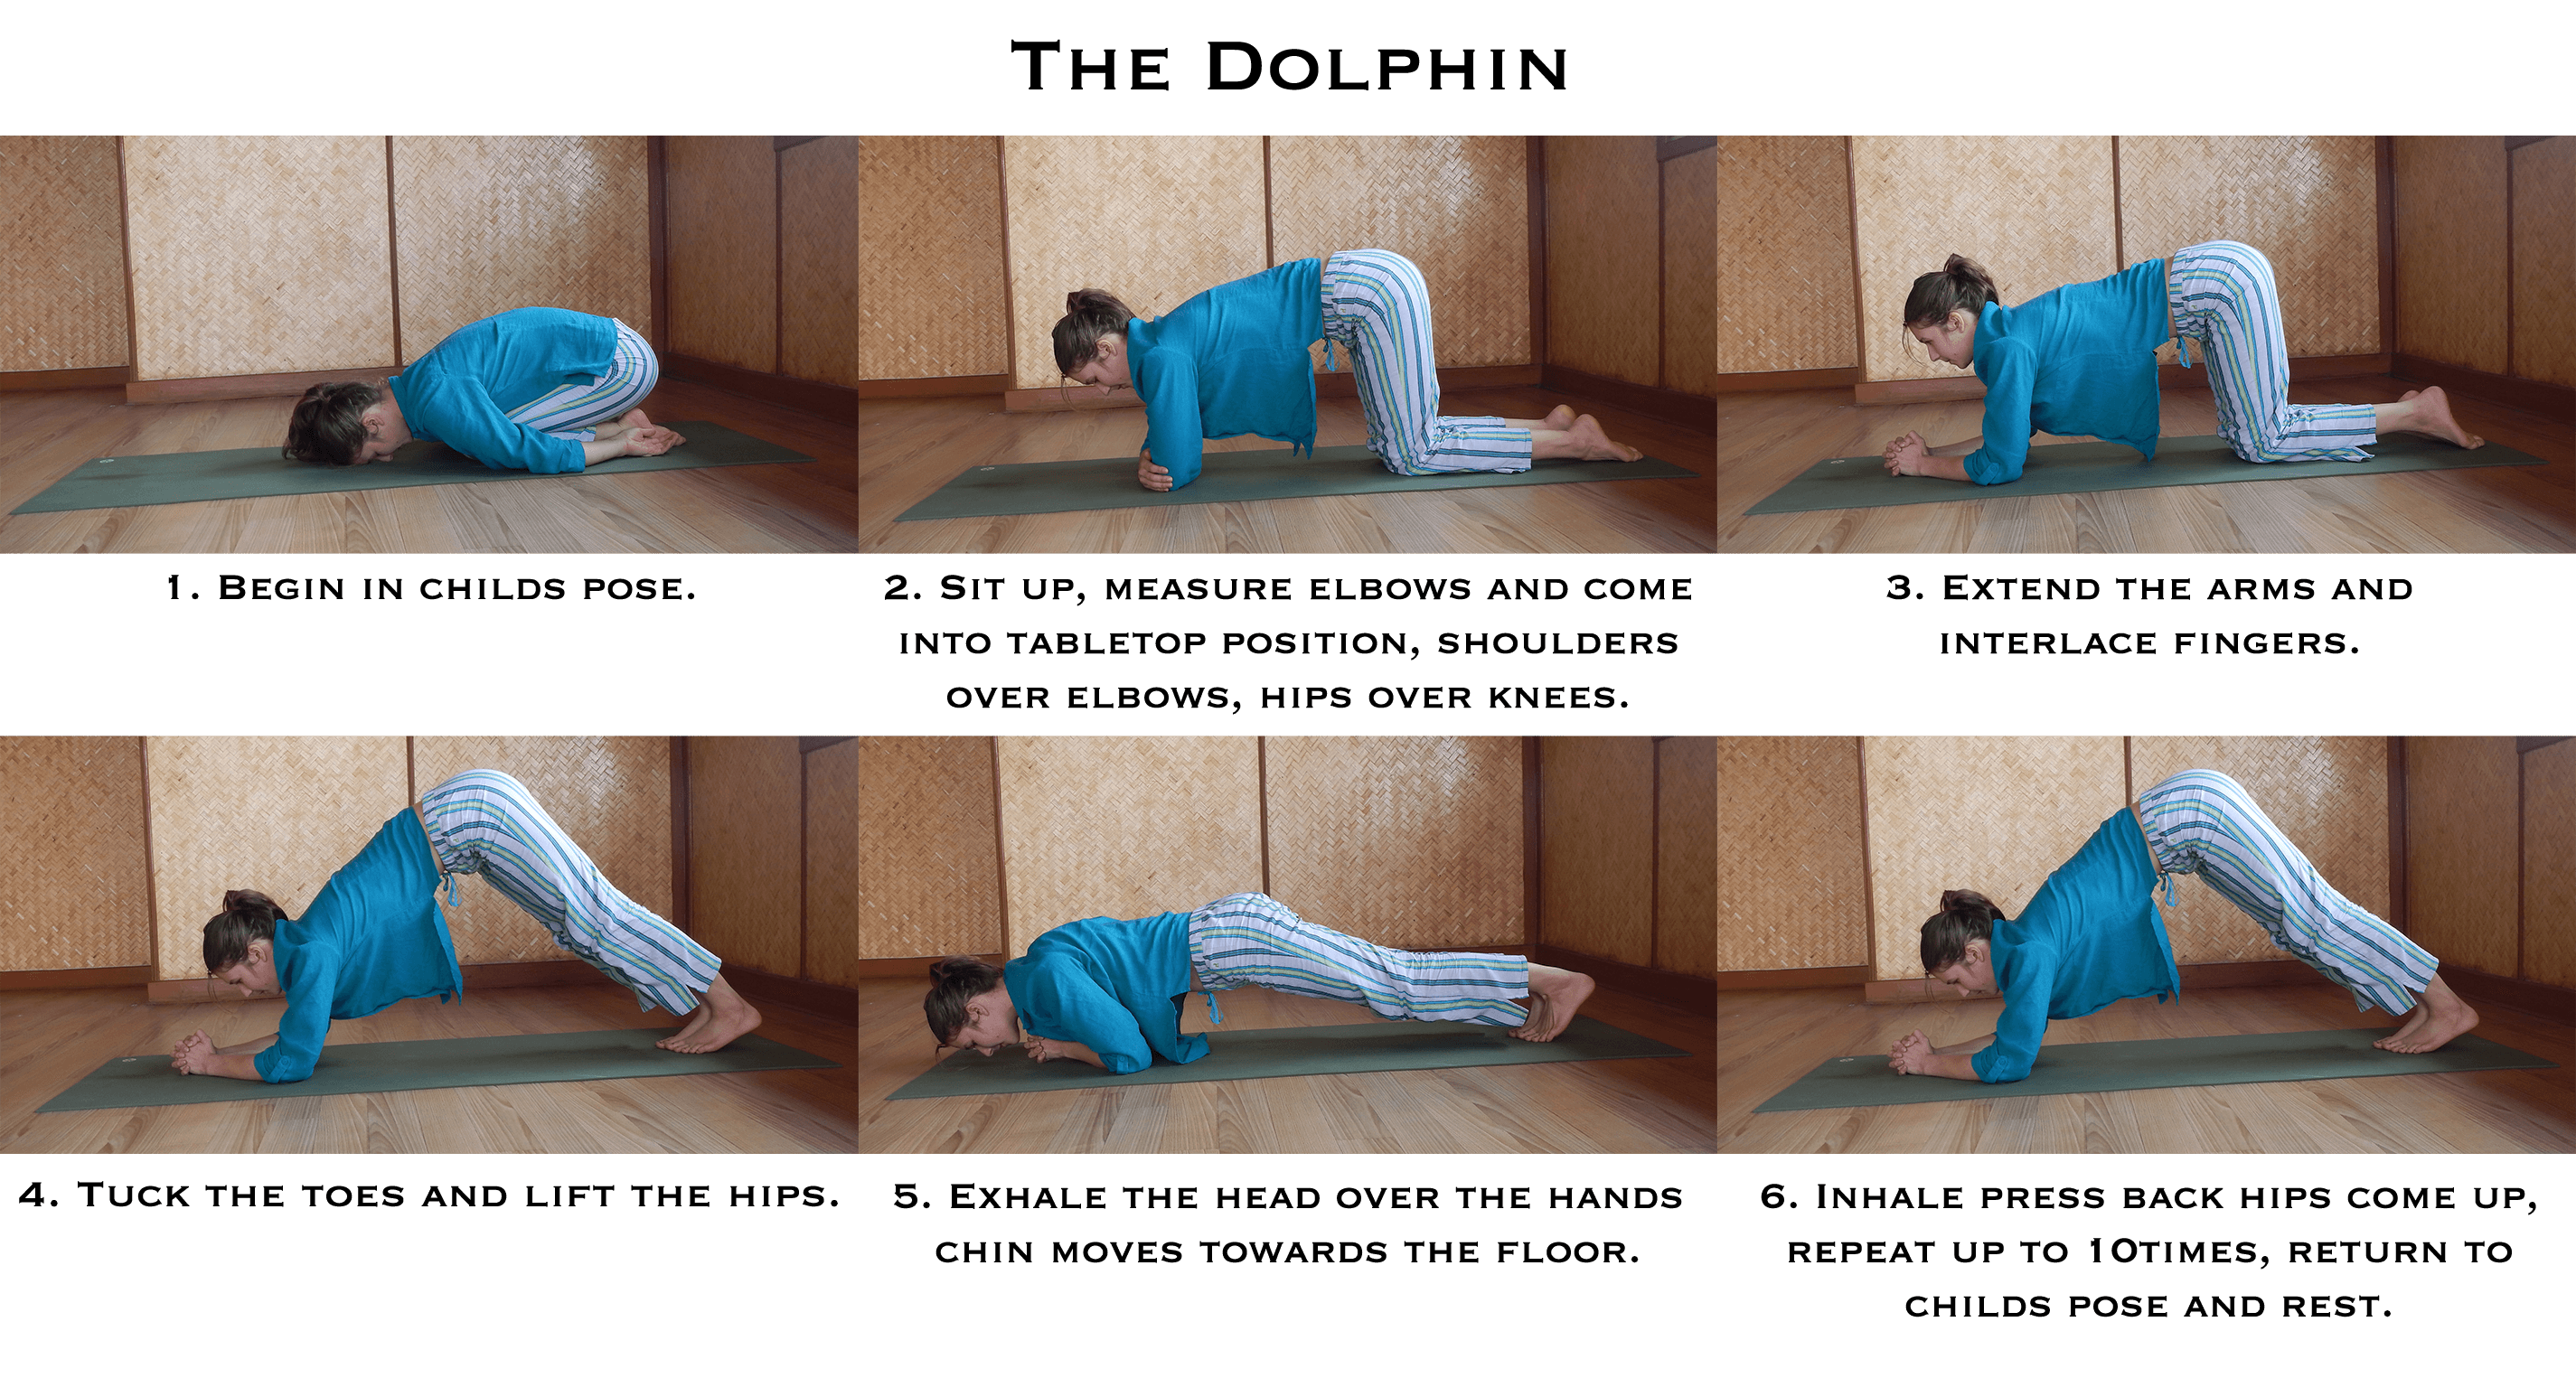
The Dolphin
If you are still preparing your mind and body for the Headstand then you should practice the Dolphin. The Dolphin is a modified pushup helping to strengthen the arms and shoulders.
Pointers:
- Make sure the elbows are under the shoulders, the wider the elbows the more arm strength required.
- If the Dolphin is too difficult try walking the feet back away from the head.
- If the Dolphin is too easy walk the feet closer to the head.
- Try to practice three rounds up to 10 repetitions per round, resting in Child’s Pose between each set.
- Be patient, don’t overdo it, with daily practice you will get stronger quickly.
Have fun, Om Shanti!


It is very useful to me.Many thanks to teacher Mahadeva.
You are welcome Weipu, wishing you the best in your yoga studies. Om Shanti